Hi everyone!
Welcome to “Tuesday’s Tag”! These posts feature how to create different styles of tags that can be used for the usual purpose ~ gifts. But tags can also be added to scrapbook layouts, cards, albums and journals. I hope that you will join me and enjoy creating some tags 🙂 I alternate Tuesday’s Tip, Technique Tuesday, Tuesday’s Tutorial and Tuesday’s Tag just to change things up a bit.
Today’s tag: Pieced Christmas Tree

Since Christmas day is two months from tomorrow {yikes!}, today’s tag is for Christmas. This tag is simple and easy to mass produce for all your gifts and packages. Plus, it makes great use of DSP scraps eliminating the need to cut into full sheets.
You will need: card stock, patterned paper {DSP} scraps, cutting tool of choice, store bought tag or tag punch/corner rounder {if making your own tag base}, hill die {optional}, snowflake and “to/from” stamp/ink, adhesive, glitter, ribbon/twine, embellishments. ∗Please note: if you choose to heat emboss the snowflakes or greeting, you will also need a powder tool and heat tool.
∗Please note: you may click on the link below for a printable project sheet.
#1} Cut the card stock to the size you want the tag to be. I cut this one to 2″ x 4 1/2″ and then used a tag punch for the top. You can also just round the corners or leave them as is.
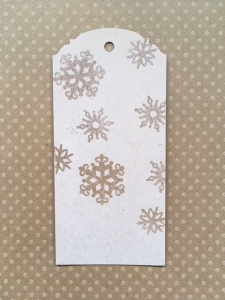
#2} Stamp the tag base randomly with snowflakes. I used VersaMark ink for stamping and glitter embossing powder before setting with a heat tool but this is not necessary ~ good old plain ink looks just as pretty.
#3} Tear white card stock to resemble a snowy hill or use a hill die. Adhere to the bottom of the tag.
#4} Stamp the “to/from” at the bottom. You can heat emboss it if you want to which will require an powder tool, embossing powder and heat tool.
#5} Cut 4 squares of DSP. I cut mine to 3/4″, 1″, 1 1/4″ and 1 1/2″. Now, cut each square in half from corner to opposite corner which results in triangle pieces. ∗The 4 squares will make 2 tags. Also, cut a small brown rectangle to look like the trees trunk.


#6} Add the trunk and triangles to the tag as shown.
#7} Apply glitter to the top of the hill. Add embellishments and a hanging ribbon/twine loop.
Pieced Christmas Tree Tag Printable Project Sheet
*Please feel welcome to sign up as a follower to receives updates by email so you don’t miss a thing!
See you next Tuesday!
Erin
The Country Touch
Website: http://www.thecountrytouch.weebly.com
Email: ctrytch@telus.net


